Core & Plyo Workout Plus First Week of Marathon Training

Core & Plyo Workout Plus First Week of Marathon Training

So far so good with my marathon training and balancing life, school, teaching classes, training clients, boyfriend and social life, and internship…LOL. Really though, I am pleasantly surprised with how well I’m doing so far. *Knocks wood.* I am very busy, but if you know me, you know I LOVE that and wouldn’t want it any other way. This week in particular has been a whirlwind and I feel quite tired, but also invigorated. I saw a quote this week that said, “I am so exhausted today because I was busy being so awesome YESTERDAY.” That’s how I’ve felt lately. And it’s a good thing. I’m also really excited to sleep in tomorrow morning for this reason. It’s the little things that count.

This week I shared a cool new core move that I shared on my Instagram. Since I’ve been tired this week, I just wanted to get it all done in as little as one or two moves. I also wasn’t feeling totally creative, like I said up top, so combining total core with a burst of low abs sounded like a good challenge to me! Make sure you keep your core tight, pressing it into the ground. Try not to let your low back pop up as your legs come down for the flutter kick. As soon as you feel your low back arch, you’ve gone too far! Keep your core tight and neutral.

img_1742-1
Owning you, Monday!

This move works the entire core and gets you burning up in half the time!  I was like ‘what can I double up on that let’s me get everything done in one or two simple moves?’ –> then BOOM. This move was born. I was toast guys!!!! Seriously it was really good. I didn’t need to do another move because this one got it all. Can I get an AMEN? Core done: CHECK! I love when I surprise myself with my creativity on days I’m feeling meh.

As much as I love doing large muscle groups and finishing them with core, I was just into doing just core and cardio and that’s it this past week. I wanted to be done with it in thirty to forty minutes max (I can typically spend about an hour, hour and fifteen depending on what I’m doing). We all have places to go and things to do, so this is where this workout came in handy the most.

I’ve talked a little about plyometric (plyo) moves before and they’re making their way back to my workouts. Plyometrics are movements that involve power, speed, and high intensity cardio. They’re great for HIIT and workouts like this one. Fast, challenging, and powerful. I never used to like them because I felt uncoordinated and slow. But after reading about how they can benefit my running and overall cardiovascular system, I reluctantly decided to add them. From there, I’ve grown to LOVE them. I add them for high intensity and burst of cardio where space is limited or I’m short on time. I especially love them for my HEAT class I teach since it’s always a good challenge and doesn’t require equipment–another bonus!

img_1793
Checked out the new University of Tampa fitness center this week! Gorgeous facility.

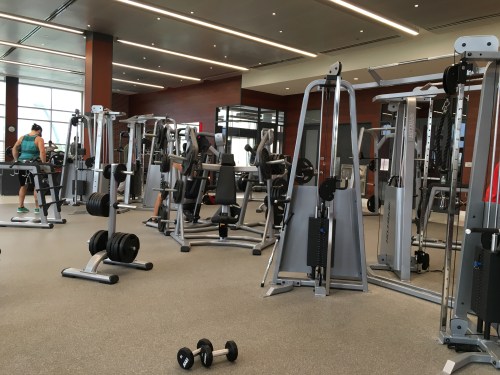
Combined with marathon training, I’m still keeping my three times per strength training days. I’ve been at this for awhile and really like how it’s fit into my schedule. Especially with my training and upcoming milage, it’s so important to stay strong and injury-free. Twice a week total body plus a quick thirty to forty minutes of a workout like this one is a perfect way to get in strength workouts.

No equipment necessary for this! All you need is a mat/towel, a water bottle, and some motivation and that’s it. 😉 Get that core working and heart rate up and you’ll be done in no time.
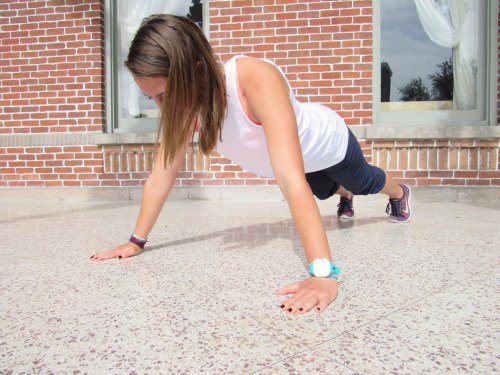
Core + Plyo Workout

  • * using a weight. I used one twelve pound weight and had a ten pound nearby
  • Three-four times total for each round going from one exercise to the next
  • Rest at the end thirty seconds to one min before repeating
  • Start with each exercise doing forty-forty five seconds each and work up to a minute

 -Overhead crunch + flutter kick*

-Russian twist + bicycle crunch

-Scissor kick + leg lift*

-Lateral bounds + single leg hop

-Side shuffle burpees

*Repeat 3-4 times*

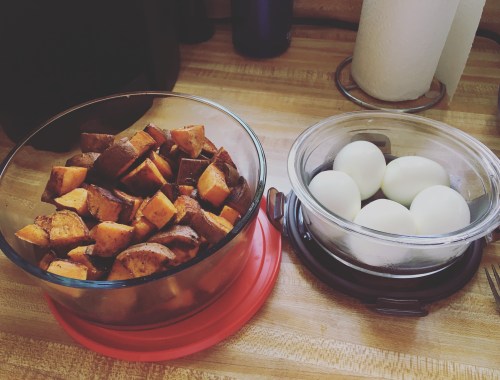
In terms of marathon training, I started last week. Again so far so good. Since having done one already, I feel confident about my training and what works and doesn’t work for me. Of course, there is always something to try and glitches to sort out which makes each training special. I’m following Hal Higdon’s Intermediate I program with a few new changes I’m throwing in. I’m adding two days of speed work and one bridge run. My race has two bridges and yes, I knew that when I signed up. My first race was flat so I figured it was time to add a new challenge. I’m tracking my food via MyFitnessPal. Strength training three times per week. Lastly, I’m adding hip and ankle mobility work since I’m as stiff as a board and am learning through my internship that I really do need to improve this. I’m determined NOT to break with my upcoming milage! My ultimate goal is finish in one piece and injury free and I feel adding the mobility work will really be a great addition! Keeping with minimal drinking and good sources of carbs, proteins, and healthy fats. Carbs are a forever friend when it comes to marathon training!

img_1759-1
Five miles done before the sun

One component I’m particularly excited about is to have my boyfriend, Harrison, be part of this training. He’s into being fit (mostly lifting upper body…I help gotta help with some lower body stuff) and running for health. He’s really supportive and is excited for me and the upcoming training! I’m hoping when he’s not studying, and when I’m not too, I can get him up early to ride his bike alongside me on my long runs. If anything he’s great at keeping me accountable. We both get up early so we text/call each other to make sure where up and moving. For me, I text him when I’m about to leave on a run and when I get back, especially when I run early in the morning. I told him a lot of carbs are in the near future so he said he would be down to keep me accountable with making sure I’m well fed. HAHA. My kinda guy. 😉

img_1789
Me & my dude, Harrison. 🙂
Advertisement
Three Ways To Improve Balance

Three Ways To Improve Balance

I’ve been learning A LOT of different things at my internship since starting it three weeks ago! It’s very hands-on and I’m definitely being challenging to think outside the box. That’s the whole point of an internship, right? One of the key components that is used a lot with the clients I work with at my internship is balance.

Not the balance like life balance…lol, although that IS a work in progress too, I talking coordination, agility, posture, body awareness, etc. It’s all important. For a while, I was working on it diligently with myself and my clients. Then I kinda forgot about it…oops. It can be one of those things that can easily be forgotten if you’re not actively working on it.

Balance was the one thing that I think got stale for me which is a reason it fell off my fitness routines. I’ve now been reintroducted to it and the various ways you can challenge it with equipment, eyes open vs. closed, kneeling vs. standing, and no equipment vs. foam padding or a bosu. The possibilities are endless. I’ve taken time to add it to my workouts and in my HEAT class through plyometric moves such as lateral bounds, lunges + single leg skips, or simply balancing one leg for as long as possible.

Unfortunately, we don’t know the level of our balance skills until its gone, like when we fall, for example. Just like working out heart for cardio and increasing strength with resistance training, we can lose balance too. Particularly as we age, it is another aspect of fitness that is lost after the age of twenty five.

So besides the fact that balance is forgotten, I figured I’d share a post on how to ADD it back into your routine to gain the benefits of improving balance. What’s so great about balance is that it doesn’t have to involve being sweaty. Weird saying I know. It doesn’t necessarily involve a high heart either. I like adding it into the end of a workout to calm the mind and ease into a cool-down. Before bed or part of a weekend fitness routine works too. I like to think that balance works body-awareness, also known as proprioception. You train your mind and body at the same time. If you participate in yoga regularly, balance poses are more then likely incorporated into the practice. Adding tree pose or pigeon pose counts when not on the mat counts too!

Do these three exercises without shoes. It gives you a sense of awareness and less support as soon as you step out of your shoes…what you want! I do two sets each side with five to eight reps each. Work up to three sets of ten or more reps or until you can easily add a challenge. Of course, try not to hold to anything! Having something or someone nearby if you do need the extra support is okay. Soon you’ll learn to not need it. 😉

Try these three balance exercises you can do anywhere and without equipment to work your balance:

  1. Tightrope walkStepping heal to toe forward and repeating backward. 
    1. Easy: Walk two steps forward and two steps backward
    2. Medium: Walk three-five steps forward and backward
    3. Hard: Walk three-fives steps forward and backward with eyes closed
  2. Three Point Star
    1. Easy: Tap your toe to the ground in the front, side, and back of you.
    2. Medium: Release toe from ground and repeat the three points
    3. Hard: Keep toe off the ground and repeat the three points with eyes closed
  3. Finger GlanceSupporting yourself on one leg, extend opposite leg out in front. Bend elbows at the ninety degrees and hold out in front of you. Raise one finger on each hand. The higher you lift your leg out in front, the harder it is. 
    1. Easy: One leg is supporting. Toe of opposite foot is on ground in front. Glance back and forth at fingers.
    2. Medium: One leg is supporting. Toe of opposite foot is off ground a half inch to inch off ground. Glance back and forth at fingers.
    3. Hard: One leg is supporting. Toe of opposite foot is off ground one to two inches. Glance back and forth at fingers.

Adding these exercises to your fitness routine regularly will over time help enhance your balance. Realizing this can also help my running, is one reason I’ve been incorporating it into my program. Although this can help train your mind, this is great neurologically and muscularly too. Just because we’re not “old” doesn’t mean we have to fall and hurt ourselves to realize balance training NOW is important. With these simple exercises you can improve sooner then later.

YOUR TURN:

-What is one part of fitness you know you can improve on?

-Anything you’ve been working on diligently that you’ve seen improvement in? What’s worked and what hasn’t?

-What does your weekend fitness routine look like?

Why I’m Tracking My Food via MyFitnessPal (Again)

Why I’m Tracking My Food via MyFitnessPal (Again)

*This post isn’t sponsored by either Weight Watchers or MyFitnessPal, I just want to share my experience with both programs! All opinions are my own.*

It’s time I make my way back to my Friday posts! 😉 Took last week off to enjoy Labor Day weekend at home and it was much needed. First weekend at home since May the night before heading to Costa Rica. A full THREE DAYS of being home never felt so good! And at a good opportunity too since we had crazy rain from Hermine, it was time to get outta dodge. I did get home safe despite the four hour drive!

As of the past couple weeks, I’ve hopped back on the bandwagon of logging my food. I used to think this was the most tedious task EVER. In fact, it was a pain in the ass to do this because it did take time and was “another thing to think about.” So yes, I get it.

Going backwards: I learned to initially log my food through Weight Watchers in high school. Yep, I was on Weight Watchers.

I wasn’t a chunk, but I was about ten pounds heavier then I needed to be. Being 5’2 and relatively small-framed, I gave it a shot. The most ironic thing was that I ran cross country so I exercised everyday, but that mentality of “I ran x amount of miles, I can eat that” happened way too often. Hence, my mom gently bringing up the fact that, “I would be happier being ten pounds lighter”–yep, mom’s words I still remember. It wasn’t like I was rolling on the floor, but I figured why not? My mom was also doing Weight Watchers so she said she could fill me in on how everything worked and we could do it together. I never saw myself as heavy or that “this is a problem and I need to lose weight” it was more of an opportunity to learn how to eat healthy and be aware of what I’m eating with a small weight-loss goal in mind. A little bit of tweaking of my diet and measuring my portions (a weakness I still work on daily) I saw the pounds come off. It took two months, but it was a VERY worthwhile two months of learning.

Today, I still use some of what I learned from WW from time to time! I love how it educates the person on eating healthy and being aware of how to enjoy little indulgences without saying NO. It is one few things out there that I agree with among all this weight loss program BS and what I recommend to my clients for those looking to lose weight. You can eat real food! Measuring and tracking keep you aware without sacrificing what you love. I’m not gonna rant about WW, but to get a better idea, check this out.

Anyways, back to the current topic.

It’s been since 2011 since I tracked my food via WW writing it all down. I jumped back on board after high school using MyFitnessPal. After a bit I got the hang of it, so I stopped until three weeks ago. After letting the fat kid in me have what she wants for the past month, I decided I needed to clean up my eating habits and got back into using MyFitnessPal.

I started logging in MFP and it has OPENED MY EYES to how I was eating. Not bad, but I needed improvement. As much as it was tedious to get back into logging my food, it is worth it. Now I enjoy seeing my numbers change throughout the day haha! and I feel more in control of my eating habits.

Below are my reasons WHY I chose to jump back into food logging:

1.) Keeps me aware of how I prioritize my macros (carbs, fats, proteins)

-Knowing I had x amount of calories throughout the day gives me have a better understanding of how to prioritize my meals while keeping me on track.

2.) Re-learning portion control

-I’ve always been good about measuring, but it can be a pain in the ass. I eye-ball certain things, but I seem to always over-estimate…go figure haha. Portioning out certain things helps me know what I can still enjoy without overdoing.

3.) Exercise ALWAYS counts–no matter how small

-We all know this, but no matter how small, it all adds up. Sometimes I kill it with a great speed workout and weights. Other times I wiped and just run a mile as fast as I can. I count those. One thing I have to be mindful of, is that although you get calories added back, it isn’t a free for all.

4.) Breakdown of micronutrients

-Not something I constantly monitor, but I do check occasionally. I love seeing the amount of fiber, sugar (the closest one I monitor), sodium, and various other vitamins and minerals change throughout the day. Best part is that MFP will remind you if you have met or exceeded your daily allowance.

5.) MyFitnessPal Blog is GREAT!

-MFP has come a long way since 2011. Now it acts as social media hub in a way with a “newsfeed” to see blog articles and “friend’s” accomplishments and exercise they’ve completed. Of course you can set your preferences to not have your diary, exercise, etc. be posted, but it is fun! I especially love some of the fitness articles they post regularly. Their recipes always look good (haven’t tried any yet) and their workouts are creative and are pretty basic to follow along. A great start for anyone looking to try a new recipe or exercise routine.

Even as personal trainer and as someone who loves fitness, we all are human and mess up. I enjoy indulgences as much as the next person but now I’m aware of WHAT and HOW MUCH I’m putting into my body. Learning as I go helps me share experiences and lessons  with clients, family, and friends in hopes someone can learn something!

YOUR TURN:

-Have you had a recent setback or comeback into fitness or healthy eating?

-Do you log food? Is it on MyFitnessPal or another app? OR do you write it down?

-What is your favorite indulgence or dessert?

End Summer Right: Yoga with a Twist & Splash Sundays At the Epicurean Hotel

End Summer Right: Yoga with a Twist & Splash Sundays At the Epicurean Hotel

*Disclaimer: As a member of the Tampa Bay Bloggers I was able to attend Yoga with a Twist and Splash Sundays for free in exchange for this blog post and social media love. All opinions are my own.*

Hey Friends! A few weeks ago I was able to partake in a monthly event, Yoga with a Twist, held at the Epicurean Hotel in South Tampa. Currently living in South Tampa myself, I never had a reason to go to The Epicurean, but as soon as this opportunity came up, I said it’s time!!

Now, I’m not great about doing yoga. I like it, but haven’t found that sweet studio or instructor I clicked with. I did it regularly during my undergrad because I loved loved loved the instructor, the type of yoga, and the timing of it in my schedule. I wouldn’t call myself a yogi, since I don’t do it regularly anymore, but will for sure give my damnedest when I do get a chance to go. It is definitely one area I always need to work on. Remember my post on yoga for runners and my foam rolling routine? I explain my struggle of recovery there, and am pleased to say I have been MUCH better at fitting it into my schedule. Still a work in progress but its happening—in case you all were wondering.

IMG_1484-1
Enjoying champagne with Caitlyn post yoga!

The thought of yoga makes me feel excited even though it’s not my fav. When its combined with my friend, Caitlyn, who is also into fitness-y things, plus heading to the Splash Sundays pool party after, I said YES!

Yoga With A Twist, the official name, is a once a month event held during the last Sunday of the month at the Epicurean Hotel, a local boutique hotel located off South Howard. A good way to get in a one hour yoga class, hang out at the Epicurean, and cheers with Champagne with fellow yogis is fun and a popular way to enjoy the morning.

Reservations are required and are $15 for the class and $20 for the class and glass. Each class is offered by Kodawari Yoga, Bodywork, and Wellness Studio. Make sure to bring a mat, water, and a towel. Refreshments were available during the event and cool towels were given right before Savasana (cool-down pose). A nice refreshing way to end class!

IMG_1486-1
Cheers to a great class!

There was about forty people participating in the yoga. Each person brought their own mat, water, etc. and was done under a huge white tent near the roof of the hotel, at the Garden Terrace on the second floor to be exact. Although it was hot, the tent was beyond helpful as well as the ice water and tea that was available during the class.

The class was done in a vinyasa-type style. In case you’re not familiar with the different types, I’m meh on my yoga let alone knowing the different kinds, LOL, but basically this was a flow type class. With a few variations to add a challenge, it was definitely a good class with a mix of challenge and easy. I’m right in the middle and found there was a good balance. It was also nice knowing there were two spotters nearby who help correct as needed. Since this event was once a month, I’m not sure it is always run by Kodawari Studio or has the same instructor each month. I’ll have to go more then one time to see if it is or not. ;P Have I mentioned that guests participating in the yoga get 10% of Élevage brunch menu items and 15% off spa treatments? I haven’t been to Élevage yet, but have heard it’s pretty tasty and requires a reservation.

IMG_1475
Post-yoga conversation to end our practice

After class it was super chill and everyone got champagne for a toast. After the toast, everyone hung out and chatted or in mine and Caitlyn’s case, headed to the Splash Sunday pool party!! WOO!! Did I mention the Tampa Bay Bloggers hosted Splash Sundays that week?!

IMG_1494-1

The two events don’t work together, but anyone who wanted to join in the pool party could join in for the afternoon. However, a reservation is needed and requires $15 entrance fee. Splash Sundays is offered July 3rd to September 4th from 12-5pm and includes pool time, lounge chairs, umbrellas, and DJs that provide music as you chill in the pool or get your tan on. Drinks are also available but are not included the in the reservation. Depending on if you’re getting a group together, a cabana is an option for larger parties.

IMG_1496-1

A super fun way to end your summer or way to enjoy the Epicurean, their pool, drinks, and music! I know not having a pool, this was a great option that I’ll keep in mind for next time!

IMG_1502
Enjoying this sweet pineapple float 😉

YOUR TURN:

-Do you participate in yoga?

-Do you prefer a fruity cocktail or a light and refreshing spritzer by the pool?

-What is your favorite way to spend a summer afternoon?

Challenge Your Core: How To Nail The Perfect Plank

Challenge Your Core: How To Nail The Perfect Plank

Happy Friday!! Figured I’d add a workout-type post this week since I’ve been switching up my planks lately. I practice a lot of them on myself and then add them to my workouts for my HEAT class and with my clients. In case you’re reading this and am like, “hmm what”- listen here!

FullSizeRender-7
Standard Forearm Plank

I LOVE planks let me tell you. If I can’t figure core-wise what I wanna do, my go to is a plank of some kind. There’s so many options and you don’t need any equipment to get the most of this exercise. Switching your arms, legs, and movement patterns throughout your torso and you’re bound to challenge yourself differently every time.

A plank is an exercise used to isolate your core (abs and low back). Planks are all about contracting, namely through isometric movement, known as holding/squeezing. 

Tips to good plank form:

  • Back flat
  • Butt down
  • Hands under shoulders (modified plank)
  • Forearms/elbows unders shoulders (standard plank)
  • Breath!

Planks are all about time. No need for counting any reps. What I would suggest to someone doing a plank for the first time is focus on good form first. Time doesn’t mean as much if the form isn’t there. Seeing yourself in a side view using a mirror using my tips above is the first step. However you hold yourself, keeping the core tight and engaged is key to get the most out of your plank. The goals is to have good form first, then start the timer!

Once your form is good, start the timer and hold as long as you can until you lose form. Once form is lost, stop the timer and make a note of the time of course!!! 😉 Adding five to ten seconds at a time with good form is a good way to start. Working up to fifteen seconds then to twenty, thirty, ultimately a min or more is the goal!

FullSizeRender-9
Modified High Plank (hands come under shoulders here ;P)


YOUR TURN!

-Favorite plank variation?

-What’s your go-to core exercise?

Strengthen The Low Back: Deadlifts & Core Warm-Up

Strengthen The Low Back: Deadlifts & Core Warm-Up

Happy Friday! Finished my first six week grad school class last week, and started my second one this past Wednesday! One down, last summer class to go. Before I start writing this, I checked out the syllabus and wrote out the semester in my planner for due dates of assignments, class topics, etc. I love my Erin Condren planner and it being so easy to plan and use, I highly suggest it if you like to write everything down!

Even with being in school, I decided to change up my goals and routine to incorporate one more extra day of strength training. I figured add in another day because I can make it happen with my schedule and having that extra workout keeps things fresh. See my post on squeezing in strength training into a hectic schedule hereOne exercise that is great for fitting into this time frame, is deadlifts, or any core exercise for that matter. Just like upper body or lower body, core deserves it’s own day too. What better way to fill the extra day of strength with all core, lower back, and abs?? I do core at the end of each upper body and lower body day, but I’ve really been enjoyed having these days just to focus here too along with mixing it up with a shoulder or arm day.

One thing I’ve concluded while working with clients that have desk jobs is that their core and lower back are especially tight and/or weak. No surprise right? I didn’t actually think of this, but I was getting a lot of the same comments from everyone like, “I feel so tight in the middle of back”, “I’m stiff constantly”, and “I have occasional neck/back issues.” Unfortunately, sitting for such long periods of time affects this. Yes, walking around during your lunch hour and taking the stairs helps, but at the end of the day, desk job employees can’t do a whole lot about the sitting part of their job. Unless, they get a stand-up desk which in my opinion, is the best option out there.

This is where I come into play. Although I’m not at work reminding them to walk around (although I’m sure they would like that!) I try and focus on regaining that strength and improving their low back and core when I do meet with them.

One key component of the dynamic warm-up (stretching with movement) I’ve done with them are:

  • Cat-Cows: It’s a yoga move it’s a great way to warm up the spine and core. It gently moves the core and spine up and down while easing low back stiffness.
  • Child’s Pose: No movement here, but a great way to release any tension between sets of Cat-Cows.
  • Torso-Twists: Rotating side to side from the waist gently twists the core and spine.

Perform each movement one after the next, ten to fifteen times each, three rounds through. Once warmed-up, I show my clients the proper form of the deadlift before giving them the weight. Deadlifts are tricky since they do incorporate the low back, an area of concern for some people. Once done correctly, they’re easy to grasp and provide so many benefits!

One mistake I find often is that people tend to add a squat to the movement. The squat isn’t necessary and tends to take away from the purpose behind the deadlift. The deadlift works to use the core, namely the low back, to lift from the hips up. I like to think of hinging at the hips/sticking the butt back as a way to describe the movement. Check out how to perform a deadlift here!

Another thing that worries people about this movement, is that we’ve been told our whole lives to “use the legs, not the back.” Yes, that is true, but properly recruiting the legs AND back is what is really key. Keeping the core tight is something that we don’t think of right away, but keeping it mind throughout the warm-up and into the exercise can help keep form together.

If you’re nervous about trying the deadlift alone, start with supermans. They work the low back the same way, but without the weight. You’re also on the ground which takes the thinking out of the movement. Check out how to perform the superman here!

Be sure to cool down and stretch the core once you’re done! The child’s pose is a good one post workout as well as the hamstrings toe touch. *BONUS* perform hamstring stretch sitting. It’s more intense this way because the floor is keeping your legs supported as opposed to standing up. Feel free to add a slight bend to the knees if you have tight hamstrings like me 😉 Work up to keeping the legs as straight as possible.

LET’S CHAT:

-Do you suffer from a tight low back? How do you keep it from getting cranky?

-Do you do yoga?

-Thoughts on stand-up desks?


How You Can Add Strength Training To Your Already Hectic Schedule

How You Can Add Strength Training To Your Already Hectic Schedule

Happy Friday!! Fridays have seemed like a good day to post new material so I’m getting excited about making this a more regular thing. With school, I’m able to post about once a week, if you haven’t already noticed. I’m excited to keep cranking out new posts despite the fact that school is in now happening.

Anyways, to the blog topic: Strength training! To be honest, not my favorite thing. Just like I mentioned last week recovery isn’t my favorite thing. I’ve been very real the past few posts, but its a good thing at times because no one is perfect! 😉 I really enjoy leg day, practicing my pull-ups, and bootcamp classes but nothing makes me happy as running. However, running doesn’t enhance my entire fitness. It’s cardio, comes with different benefits, and is only one part of my program.

Strength on the other hand, complements the cardio. You build specific muscles, prevent injury, and improve bone health to name a few benefits. Yes, cardio does some of that too, but strength is specific to weight bearing. Weight bearing or resistance training meaning anywhere from bodyweight, to resistance bands, dumbbells, etc. If you haven’t check it out, be sure to look at my Why Women Should Pump Iron post to get a good idea on key reasons to starting lifting!

“I know how great strength training is, but I don’t have time for a full hour of it!” –>I’ve heard a million times. No one says you have to do a full hour to get benefits! Recently I’ve changed some goals to where I switched over to doing 30-40 min workouts using smaller muscle groups that take less time. Think shoulders, arms, calves, etc. I’ve done the opposite too using big muscle groups like legs and back to hit a lot in a short amount of time to get more bang for my buck. I still enjoy a good leg day so I’ll keep one of my strength workouts closer to an hour because leg days are favorite–no other reason.

Still feeling unsure of how to tackle a short workout and getting similar benefits? View my tips below to see how to build a effective 30-40 workout!

  • Pick a muscle group: Upper body, Lower body, Core. Keep it simple!
  • Set an end time: How long do you plan on working out for? Need to be done by a certain time? Estimate a half hour to forty minutes from the current time and make an effort to get the workout done! Knowing you have a deadline makes you prioritize what needs to get done, from your rest between sets to how you order your exercises.
  • What’s available equipment-wise: In a hotel room, park, or stadium? Use the benches, stairs, or field to get a kick-ass cardio/hiit style workout in! If small weights are available add squats, overhead press, or bicep curls to the mix. The more options you have, the more complicated the workout becomes. Don’t overcomplicate anything though, use it to be creative and challenge yourself! Bonus points if you have it all set up ready to use instead of taking what you need as you go! Those extra steps back and forth add up to wasted time.
  • Make sure you build in a warm-up and cool-down before and after: This would ideally be included as part of your thirty to forty minutes of work. If you’ve been sitting for a bit, a longer warm-up might be necessary. If you’re like me and are always on the go teaching, training, running, etc. a few minutes might be enough. The key is to feel warm and ready to go. Not still stiff from sitting. Think five minutes of dynamic movement.
  • Best way to keep it at the thirty-forty minute mark–put it on your calendar!!! Book it like anything else in your life. I say time and time again that if you schedule your workout in a planner among your other commitments, you’re likely to stick with it. ‘Nuff said. 😉

Let’s Chat!

-What’s your favorite muscle group to work?

-Tips that you find helpful to fitting in your workouts each week?

-Any fun weekend plans?

My Fifteen Minute Foam Rolling Routine

My Fifteen Minute Foam Rolling Routine

Hey Everyone! Happy Friday!! Hope you all have had a productive and good week. I’m on my fourth week of grad school and so far so good, but is quite the challenge. I’m definitely being pushed out of my comfort zone with studying since it really is a whole new level of knowledge. I’m more then half way through my course, then I’ll have about a week and half or so off then return to my next six week course after the forth of July.

First off, what is foam rolling? Foam rolling is a recovery mechanism that releases adhesions, or knots in the muscle from repeated stress. It promotes blood flow to the affected area through rolling the muscle. Scientifically, this is called myofasical release, meaning ‘myo-‘ for muscle, ‘fasical-‘ referring to fascia meaning connective tissue, and ‘release’ from releasing tension on muscle.

With that being said, I figured I share my foam rolling routine and talk recovery since that is equally important too. I’m always go-g0-go. Constantly having a plan of action is my jam. For me, each week (even if its not set to a tee) has some kind of workout in it. It’s either just one workout of cardio, usually running or weights, either body weight or some kind of resistance. Twice a week I work out twice a day, usually in the morning then in the afternoon either a run then weights or weights then speed work.  Then I have a rest day or two. One thing that is weak in my own program is recovery. YEP, I said it. In fact, it’s probably my biggest weakness. Yep, I said it again. It really takes a lot out of me to focus on this. But I’ve learned over time that it is equally important in order to bounce back well from workouts. That doesn’t mean I get massages every week. I’m on a student on a budget, so that’s not happening! BUT I can do my own job of recovery instead and it starts with a foam roller.

Way back when I started running I was hurting a lot because of a lot of things like not strength training, stretching, and eating well (I ate Bud’s Chicken– a “nice” local fast food drive through post cross country and track meets). One big culprit (although all of them are significant), was foam rolling. I got to college and I had terrible IT Band Syndrome. It was so bad I could hardly walk AND on top of it I was training for my second half marathon. How I did that feeling like sh*t I don’t know but I ran it. Dealing with severe tightness, I learned from a professor I took a class with what foam rolling was. Thank you Exercise Science degree!! 😉 I was so tight and uncomfortable I hated it, but is showed me how much I really needed it and how it important it is to do regularly.

To this day, I’m not great at it, but I do it often enough now that I have my tightness under control and my IT Band Syndrome at bay. I’m still tight there from time to time, but it was WAY more manageable then when I wasn’t doing it at all! I was seriously like a grandma looking back now. How I went that far without rolling was my bad BIG TIME. Sometimes it takes a hard lesson to be reminded how important it is.

Okay, so fast forward to TODAY and I probably roll out two to three times per week. I could more, but I don’t always. I know. I can be better. It is something I struggle with and realize it is something to work on so I try to make it part of my routine somehow. So, I do it before bed as part of my bedtime routine. It takes about fifteen minutes, but it is well worth it. I especially love rolling while watching The Bachelorette or American Ninja Warrior. Roll and watch, it’s a good combination.

If you don’t have a roller and you workout, run, or train multiple days a week rolling is especially beneficial and definitely worth the investment. They come in all different kinds of firmness, treds vs. no treds, brand, etc. However, they are on the pricy side depending on what you’re looking for. I suggest starting with a softer roller (like a pool noodle type softness) and go from there. My favorite is Trigger Point brand recovery tools. They have a great variety for all types of recovery needs! Although I focus on legs, foam rolling can be for all over. If I roll out my whole body, it usually takes a half hour to forty five minutes. I find I have the most amount of time for this on the weekends. During the week I stick with  rolling for about fifteen minutes.

For my routine, this what I do two to three times each week. Starting easy from the bottom and working up or vice versa. Roll a little bit at time, about an inch more in one direction before go back to your starting point. If you feel a particularly tight or tender spot, hold there and breath. I broke it down here, but feel free to check out my video for a visual on Instagram to help get a better idea!

-Starting at the bottom of foot roll five to ten times up and down

-Foam roller under ankle, foot is resting on top, achilles tendon side down:

  • dorsiflex and plantar flex five times
  • circle the ankle in one direction and reverse
  • turn inside then outside ankle to roller and circle one direction and reverse

-Roll up shin to calf until back on knee (it’s safe with light pressure)

-Roll from bottom to top of hamstring up to the glutes

~Switch legs and repeat!~

Why Everyone Can Do Plyometric Moves Plus My Three Modifications

Why Everyone Can Do Plyometric Moves Plus My Three Modifications

Happy Friday friends!! Its been a while since I posted a workout, so I figured I’d share a bit of what I do with my HEAT class and what I do with them since I do a fair share of plyometric moves in a bit of each of my class’s and my own workouts.

In case you’re wondering what plyometrics are, plyometrics (aka plyo) are a form of cardio using intense amounts of effort in a short amount of time. I do a combination of them in between different exercises to add an extra challenge and calorie burn or lump them all together for longer duration to focus on cardio alone. It’s really whatever you like!! A few examples of plyo moves are lateral bounds, depth jumps, vertical jumps, box jumps, power push-ups, medicine ball throws, and last but not least–burpees. The factor that makes these “plyo moves” is the added burst of intensity, namely the jump/throw movement or using the word “power.”

With plyometrics comes with impact, just FYI. These movements aren’t something you do for long periods time because they’re intense, you don’t need to do them for long to get benefits. The longer you can go, the better you’re getting at them! Although that’s not a bad thing since it shows your improvement, it means you can also make it more challenging ;).

So you might be reading this and thinking, that you’re not up to that level or you’re coming back from an injury (do I hear cranky knees?)…that’s okay! The best part is that plyo moves offer modifications so anyone can do them! I admit, I was not great at them off the bat, in fact I was terribly uncoordinated. Wait, I kinda am still uncoordinated jumping and moving around at the rate I’m going, but overtime I worked up to it using modifications. As a result of working at these, I look more put together as a result too! Yay to looking less clumsy and more coordinated! 😉

Guess what the secrets are? You’ll be more apt to try them knowing you can drop the intensity and still get benefits with these modifications:

  • ELIMINATE THE JUMP OR POWER MOVE! Yep, simple as that. Lateral bounds without the hop in between, box jumps with alternating high knees, medicine ball press without the throw/catch. Wanna make it tougher? Add the jump, but jump HIGHER or onto something higher, throw a heavier ball, or simply increase time or reps.


  • Go At Your Own Pace – Just like standard cardio, go at a pace that feels comfortably hard for you. Keep in mind the talk test. If you’re huffing and puffing and can speak in short choppy sentences, you’re doing it right. If you’re at a conversational pace, you can up the intensity.


  • Time Work and Rest According to Ability – You’re putting through an intense amount of work in a short period of time, ya gotta rest to replenish! So how long do you rest? I’d say work for as long as you rest. An example would be work for thirty seconds then rest for thirty seconds. My sweet spot for these is forty five seconds. A period of time between thirty seconds to a minute is a good amount of time to start. Again, this is whatever you like! So think outside the box too. Twenty seconds of work and ten seconds rest is really good and tough! (aka tabata!) Try four times of work and four times of rest. Play around and see what you like.

If you’re doing lateral bounds for thirty seconds and feel tired, but not wiped you’re doing them right. Pair that with a thirty second rest and you should feel ready to tackle another hard thirty second bout again. Making the movement intense for that amount of time should leave you feeling fatigued but not so wiped you can’t continue. If you do get to that point of fatigue, instead of completely stopping, MODIFY! Remember my suggestions at the top? This is when you can use them! You still get benefits of the movements even with the modifications.

So behold, by plyometric workout below! I’ve added the plyo moves in between other moves like this one here, but doing them at the end when you’re tired is good too!

Plyometric Workout with Odd & Even Numbers

Format: Two times through each round, two times through with plyo moves*, sprint once after both rounds then rest after last round for one minute.

Lower Body = 15x, 20x; Odd Rep Plyo Moves*

-Squat Jumps

*9 burpees

-Sumo Squats

*7 burpees

-Reverse Lunges (15 and 20 reps both sides)

*5 burpees

-Wide/Narrow Squats

*3 burpees

~Sprint~

Upper Body= 15x, 12x; Even Rep Plyo Moves*

-Power Pushups

*10 lateral bounds (double count- left and right sides equal one rep)

-Lat Tap Pushups

*8 lateral bounds (double count)

-Tricep Pushups

*6 lateral bounds (double count)

-Standard Pushups

*4 lateral bounds (double count)

~Sprint~

Rest!

Meal Prep: How You Can Fit It In & Not Be Overwhelmed

Meal Prep: How You Can Fit It In & Not Be Overwhelmed

Happy Friday! Meal prep seems to be a common thread everyone seems to be battling with at one point or another. It also can be intimidating AF because where do you start?? I’ve had a few thoughts, which have turned into excuses:

  1. I don’t meal prep AT ALL and I end up paying for my laziness by eating out and choosing less then healthy options
  2. I’m not sure what I’m in the mood to cook
  3. I’m not in the mood to prepare it
  4. There’s other things I’d rather be doing and meal-prepping isn’t one of them

Have you had these thoughts? I have, but have limited them and have changed them for the better. Once I meal-prep, I can officially consider myself set up for success. I spend less money, feel the need to not waste food, and having it prepared for me gives me ZERO excuses for eating healthy. Three killer reasons why I make these reasons alone the reason I *try* and do this every week.

On the other hand, life happens and this doesn’t always get done. And guess what? Does the world end that I didn’t meal prep? NO! Does that mean I’m not gonna be set up for success and therefore fail with my meal choices? NO! It just means I have free reign…both good and bad 😛

IMG_1165
Roasted sweet potato with salt, pepper, olive oil, and cinnamon; hard-boiled eggs

So the question is, how do you fit it in?

I start by figuring out what I’m in the mood for that week. Sometimes I know instantly what I want. Other times I look through my Meals on The Run cookbook from Runner’s World, use Instagram for inspiration (check out #bgbcommunity on Instagram–you’ll be drooling over your phone in no time HA!), or tbh–the grocery store itself, although I try not to do that too often. I find flavors or ingredients that interest me or I look at factors of a recipe like time and servings to decide.

For me, I prep on Sundays. It’s a slower day for me usually so I grocery shop then come back and whip up whatever I’m making so its fresh and ready to use. I like one-pot meals a lot or one-bowl type dishes like salad since they’re both something you heat up or assemble in as little as a half hour and it’s ready to eat! I don’t have time to stand in front of a stove and cook fresh every. single. night. and I’m sure you don’t (or want to) either. So why make it tougher then it should be? Meal prep for the week ahead and you’ll have a fresh, healthy meal at your finger tips!

There are weeks I don’t have time to make a full blown meal with all the fixings on a Sunday, or I simply just don’t want to. But instead of not doing nothing at all, I pick one or two items that are quick cooking so I have at least some kind of snack, vegetable, or carb ready to be thrown in to something during the week. Recently, I love cooking hard-boiled eggs, which take about fifteen minutes, and sweet potatoes which take about twenty. Both go at the same time and you don’t really need to watch either too closely! Between the two, both are done in about an hour or less. Seriously, NO EXCUSES! And even though it isn’t “meal prep” it’s more like “meal prep-prep” it’s still setting you up for success in one form or another right? Isn’t that the whole point??

Another thing that doesn’t always come with the actual prep, but something to keep in mind, is how much food you’re really getting out of the food you’re making. I cook for me, so I pick dishes that have about four servings in them. That number works for me because I get bored of eating it as the week goes on–for real though and once I get bored of it, I tend to waste it which doesn’t do my wallet any good. Any dishes six to eight servings, I tend to not look too closely at just because it feeds too many for just me! Looking at how many you’re cooking for and who you’re cooking for (hungry husbands, a family, someone who always traveling/on-the-go) is one factor I feel is most important when it comes to meal prep.

Now the type of person you’re feeding is another whole topic in itself since you want to please whoever you’re feeding too. Getting the kids, husband, whoever involved will make meal-prep an easier thing to tackle. If it just you, like it is just me, make whatever you want!! #perksoflivingalone

The funnest part of the whole meal-prep idea is the CLEAN UP! lol…just kidding. It’s my least favorite part of the whole thing to be real, but it’s gotta happen. You can make it easier by using foil or parchment paper to make clean-up easy too. Here’s a tip: DON’T use Parchment paper to broil hahaha. I made that mistake and I created a small fire in my kitchen one night making mini english muffin pizzas. All is good!! I put it out but instead of Parchment paper, use foil instead *face palm*–no flames to worry about with that. Anyways, clean-up is cut in half and makes the whole meal-prep process that much smoother.

Hoping this post leaves you feeling more inspired to try meal-prepping! Taking it step by step and not feeling intimidated is key. See it as a learning experience! Either you’ll enjoy learning to cook new things or you won’t…and in the latter case you know you at least made an attempt!

Good Luck and Happy Meal-Prepping!

YOUR TURN:

-What are you favorite go to snacks or dishes to meal-prep?

-What is one thing you want to work on or try with meal-prepping?

-Any fails with meal-prep or kitchen disasters? LOL